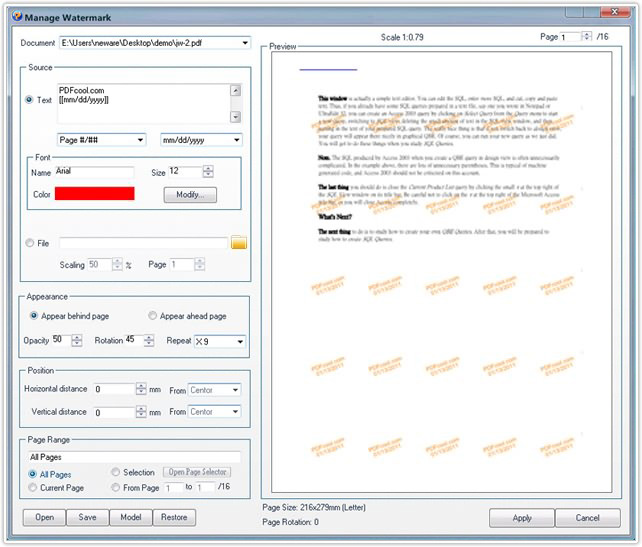
The PDFCool Studio watermark tool allows the user to quickly add text or image watermarks to one or more pages in a PDF document. You have full control over the position, size, opacity, and more of your watermarks, and you can save them as project files for reuse.
From the top menu bar, go to "Document > Watermarks";

Click on the dropdown list of Document, choose the one you want to insert watermarks from the PDF documents opened in the program;

Edit the text watermark: You can enter text content in the textbox directly, for example, trial mode, trial version etc. You can also choose the page number or date as watermark under Text box. The user can open the Font Setting dialog by clicking on the Modify button, or by double clicking the textbox of Name, and then change the font name, size and color. The user can also directly choose the text size and color in the Font box;
Insert file as watermark: Click on the  button, the user
can choose an image to be the watermark of the document, and then adjust the
scale of the image watermark. The user can also choose a PDF document as
watermark. Then choosing any page from the document as watermark, and adjust the
scale of the PDF document watermark;
In this area, you can choose to put the watermark behind page or ahead page, you can also set the opacity parameter, rotation angle and the number of replication of the watermark;

Setting the relevant parameters to adjust the position of watermark in the page;

With the Page Range, the user can select the pages needed to insert the watermarks(details go to the Common Work Area);
By click on the Open, Save, Restore or Model buttons lactated in the bottom left corner, the user can choose to open the watermark project files, save the current options as project file, back to the default options, or choose a watermark model provided by PDFCool team.